Monday, December 27, 2010

Christmas Gifts and a Vintage Vogue Dress

I hope everyone had a great Christmas!  Mine started on Friday, when I went to my parents' house for dinner, drinks, and gifts.  We've been doing our Christmas celebration on Christmas Eve forever.  I think it's because we used to visit all the grandparents on Christmas Day, and Eve was our time to just hang out as a family.  I finally got to wear my Holiday Dress!  I felt really festive.  I just wish I had taken the cardigan off for the photo.

Photobucket

I also got lots of great sewing things, including several Jo-Ann's gift cards.  My husband Mike got me an iPod dock so I can listen to tunes while I sew, a thread rack, and two really nice pairs of scissors.

Photobucket

Photobucket

Saturday, we headed up to Green Bay to celebrate with Mike's family.  I didn't wear the green dress I made because it seemed a little formal, and also there are some fit issues I'm still working out.  I wore a cute 50's dress that Mike bought me instead.

Photobucket

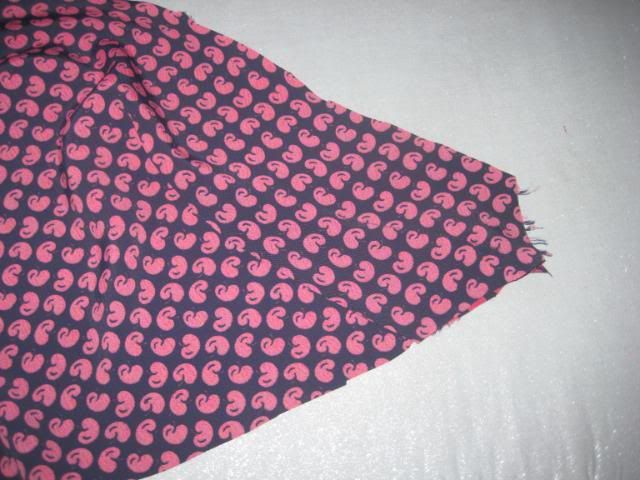
I took off work today, so I started on my Vintage Vogue dress.  I had about 6 yards of pretty navy rayon crepe with a cherry print.  Like most 1940's fabrics, it was skinny and I had to be creative with my cutting.

I laid out the few pattern pieces that fit with it folded, and cut them out.

Photobucket

For the front bodice piece and all four skirt panels, I had to open it up and cut one at a time. I got smart this time and I didn't cut my skirt panels until after I finished putting my bodice together and knew that it fit and looked good. This way, if I ruined the bodice, I still had like 4 yards of fabric to do something else with.

Things started out great.  I did the fold on the bodice front:
Photobucket

The back darts:
Photobucket

Had a super easy time with the facings:
Photobucket

I got the bodice put together super quickly. Then it was time to do the underarm gussets. Okay, let's just say I had an epic meltdown that involved throwing pieces of fabric, CRYING, and ripping the pattern to shreds.

Photobucket

I'm so embarrassed. I'm glad it was a $5 Vogue sale pattern and not something vintage and expensive. I never did get those underarm gussets together. Okay, the pattern instructions made NO SENSE and the pattern piece for the gusset was huge and there was no effin' way it was fitting where the directions told me it did. So I did away with them entirely. The sleeves are slimmer, but they are still comfortable and I can lift my arms just fine.

Photobucket

I tried on the bodice, and it looked and fit great!  It was really pretty.  So I went ahead and cut out my skirt pieces and put it together.  Wow, it is a lot of skirt!  It's so gorgeous and swingy and girly, but I have to admit I'm not super excited about having to hem it.

Photobucket

The good old stash of vintage seam tape delivered with this denim blue:

Photobucket


I had the perfect size and color zipper, too.

Photobucket

I've never done a side zipper before.  It actually wasn't bad.  I did it by hand and it only took 15 minutes and it looks pretty good.

Extreme closeup!
Photobucket

I'm going to tackle the hem tonight and hopefully wear it tomorrow.  I'm so happy this turned out!  My last two projects were really discouraging, so it was nice to have a successful one.

Thursday, December 23, 2010

Sewing a Quick Party Dress

After my last sewing disaster, I knew I wanted to make something easy, fun, and quick.  I settled on this vintage Simplicity 5663 from 1964.  I love the bell-shaped skirt and the Peggy Olson hairdo, and I bought the perfect fabric during Jo-Ann Fabric's Coupon Commotion!!! Week (sorry, the whole "coupon commotion" thing cracks me up every time I get the email.  I feel like it needs to be announced with fanfare.)

Photobucket

I still don't have an event in mind for this dress - maybe my Aunt's Christmas party on Sunday?  Or maybe the wedding we're going to in Chicago on Valentine's Day weekend.  The invite said to dress casual, which absolutely pains me.  Weddings are my favorite thing in the world.  I have a rule for getting dressed for a wedding - it has to be something vintage, and it has to be something I've never worn before.  That makes it feel extra special.  But since this wedding may have groomsmen in jeans, I best save the poufy Betty Draper dresses for another day.

After my last fitting disaster, I wasn't taking any chances.  I made a muslin.  I was worried about fit, since vintage pattern sizing is a little different than modern patterns, and that dart on the front looked tricky.  Last time Jo-Ann's had Coupon Commotion (!!!!) Week, I bought an entire bolt of white cotton.  It ended up being a dollar a yard.  I cut out my pieces and got started.

Photobucket

I marked the dots, solid lines, and broken lines with my tailor's pencil.

Photobucket

The instructions said to fold on the solid line, then sew between the dots.

Photobucket

Then from the dot all the way to the bottom.

Photobucket

I pressed the bottom seam open, and that's it! It was done.

Photobucket

It had a dart on the shoulder:

Photobucket

And at the waist:

Photobucket

I sewed my bodice back to the bodice front, and my muslin was done:

Photobucket

I tried it on, and like all patterns, there was about three inches too much room across the back.  I must have a narrow back.  Also, while the neckline looks lovely on the lady on the pattern envelope, it was too matronly for me.  I gotta show some collarbone.

I trimmed away some neckline and bodice back, and also a little out of the shoulders.  I had long since decided against the sleeves.  It's perfect now.

Photobucket

Since I didn't want to cut into my vintage pattern, I took my muslin apart and used it as the pattern.  I folded down the paper pattern at the point where I had made changes, and laid my muslin on top.

Photobucket

Photobucket

I have a confession - I hardly ever buy a new spool of thread for each project.  I tend to use what's laying around.  This spool of vintage Coats & Clark wasn't a perfect match, but I used it anyway.

Photobucket

Even though I had made a muslin, I had some issues with the bodice.  I put it together so easily on the muslin, but got confused when it came to the real thing.  I think I was overthinking it.  The dart ended up on the outside of the fabric, instead of the inside.

Photobucket

After a careful look at the muslin, I realized that I folded the bodice incorrectly.  My seam on the inside looked like this, which although looks really nice and neat, is not right.  Once I figured it out, it was a quick fix.  I had no issues with the lining.

Photobucket

Next up I did the back darts.  My orange tailor's pencil was not showing up on the smooth, dark fabric, so I used the next best thing - eyeliner.  The best part is, after I sewed the dart, it rubbed right off with my finger. I think I may buy a white eyeliner specifically for sewing.

Photobucket

The skirt had four tucks in the front and four in the back.  I attached it to my bodice and even though I made adjustments to the size, it still matched up just fine with the skirt.  I'm surprised, I thought I was going to have extra fabric in the skirt to deal with.

Photobucket

I haven't done the zipper yet because I'm waiting for the perfect one from eBay to arrive.  It's a 20" kelly green Coats & Clark, and it's part of a lot of 20 I bought for $10.99.

I hemmed it by hand, and I have to say, I'm getting to be a pro at that.

Photobucket

My secret is this hem tape. If you do a stitch on every other peak of the lace, you'll have the perfect hem. I will probably have to learn a new technique when this stash runs out (got four packs of dusty rose and three of denim blue left!) but for now, it works wonderfully.

Photobucket

Hopefully I'll get to wear it this weekend, and I promise to post a picture of it in action!  The one I took of it on the hanger didn't do it justice.

I hope everyone has a merry holiday weekend! 

Monday, December 20, 2010

Wasted Sunday

I know I said that revamping the chain-print dress was one of my upcoming projects, but I actually started on it Saturday night.  It was late and I wasn't tired, so I cut out the pattern pieces.  The pattern said it was self-lined (meaning you make the lining out of the same fabric) but I didn't have enough, so I went to Jo-Ann's early Sunday and picked up two yards of baby blue lining.

Photobucket

I started on the lining, as kind of a practice for the real thing. I figured I could work out any kinks that way. Good thing, because it went bad quickly. I sewed the front bodice yoke on backwards.

Photobucket

I was in the zone, so I didn't take a lot of pictures of me putting the lining together. Let's just say it was confusing. The person at Butterick who decided this pattern is "Easy" should be available to come to your house and help you when you get stuck. My needle must've come loose and hit the bobbin or something, because when I started on the outside of the bodice, it was doing this:

Photobucket

A quick needle change and everything was great again.

Photobucket

I got my bodice fronts put together, which actually was easy, once I figured out which way to sew on the yoke.

Photobucket

The back wasn't bad, either. There was some "pivot around the square" junk that made me have to think it through, but it came out nice.

Photobucket

Then it was time to sew the back to the front. It wasn't matching at all, and there was so much ease to work in. Then I remembered my own advice to think of things in 3-D, and I put it on a hanger. Then it was much easier to put together. Oddly, one side matched up perfectly, and the other seemed to have two inches too much fabric in the sleeve.

Photobucket

After I sewed it up, trimmed the seam allowances, and started to press, I realized one sleeve was on backwards.  That's why it wasn't matching up.  I'll be honest and say that I toyed with leaving it on the wrong way, but then I decided that I've done this much work, I might as well do it right.  Also, the lining wouldn't match up if it was backwards.  So I fixed it.

Here's my lining inside:

Photobucket

And bodice outside:

Photobucket

Finally, I sewed my bodice front, which was way harder than I expected. I had to do a little hand sewing to close the gap. Then I sewed the right side of the bodice and went to try it on.

Annnnnd, it does not fit. The seams that are supposed to be under my boobs are right across them.

Photobucket


The side doesn't close, either, and there aren't any seams I can let out since I stupidly trimmed them. My husband says the fabric is cursed and just to give up and move on to a new project. I guess my lesson learned is to always make a muslin when it's a new pattern I haven't done before.

The dress is actually really pretty, so if there's any size 6 ladies out there who would like to try their hand at finishing it, let me know and I'll send it to you. I'll even include the vintage zipper. All that's left to be done is the skirt needs to be attached, and the zipper and the hem.  Just leave me a comment with your email address!

Sunday, December 19, 2010

Project rollcall and a quick Saturday dress

I didn't go to work on Friday, so this weekend has been so confusing.  I thought Saturday was Sunday, and I thought today was Saturday.  I wish!  I have to work Monday -Thursday this week, and then I am off until the following Wednesday.

I took inventory of my projects today and this is what I have coming up.  I'm not sure what I'll wear this for, but I love the V-shaped pleat and I couldn't resist this green shantung that looks exactly like the pattern envelope.  I had a 50% off coupon so I went today and bought the fabric, along with some green bias tape and hem tape, since I didn't have any in my stash.  The fabric is normally $17.99/yard, and I only needed two, so this whole dress will cost me right around $20.

Photobucket

I also have this full-skirted wrap dress pattern from Vintage Vogue.  It's kind of daunting because you need almost five yards of fabric, but I have at least six of this navy crepe with a deep red cherry print.

Photobucket

The next thing I'm going to do is revamp the chain-print shift dress.  Even though my friend Kate said I should finish it, I just wasn't feeling it.  I measured and I should have exactly enough fabric for this Butterick Retro pattern.  I even have the perfect size baby blue metal zipper.  I stopped at Jo-Ann's today and picked up two yards of light blue lining.

Photobucket

I had some free time yesterday, so I knocked out a quick work dress.  I used one of my early 60's patterns I found on eBay, and the red fabric with the cream crescents I also got on eBay.  I thought I'd take a minute and explain what I mean by "curved seams".  This is a bust seam that's usually in place of darts to give your bodice shape.  I like them better than darts, I think they give a better fit.  They can be a little confusing if you've never sewn one before.  When you lay your pattern pieces together, they look like they're not going to match up.

Photobucket

I like to pin the ends first, and then work in the ease.  It's helpful if you try to think of this seam in 3-D.  It's not flat, it's gotta curve around your body.

Photobucket

Use lots of pins, and stretch the fabric into place as you go.  It'll match up perfectly!

Photobucket

See?  The seam stands up, instead of laying flat.  You can make it look nice and smooth by pressing it towards the center of the bodice.  Normally you press seams open, but in this case you don't.

Photobucket

A little lining and a quick skirt later, the dress is done. I trimmed it with some dusty rose hem tape from my stash (some lady really liked dusty colors) and hemmed it by hand.

Photobucket

I think I'll wear it to work tomorrow with brown tights and knee high boots.  What color cardigan, cream?  Gray? 

Photobucket

Followers